Set Recording Schedule
You can set a recording schedule for a channel of a specific device.
-
Enter the Settings page.
-
On the device list page, if the page is in list mode, swipe the device name to the left and tap
 .
. -
On the device list page, if the page is in thumbnail mode, tap the device name or tap
 .
. -
On the Live View page, tap
 and then tap
Settings. Note:
and then tap
Settings. Note:For details about how to enter the Live View page, see Start and Stop Live View.
-
-
Enter the Remote Configuration page.
-
For a device added via IP/Domain, tap
 > Remote Configuration.Note:
For details about adding device via IP/Domain, see Add a Device by IP/Domain.
-
For a device added via other methods, tap Remote Configuration on the Settings page.
Note:You should have configured DDNS for the device first. See Set DDNS.
-
- Tap Recording Schedule to enter the Recording Schedule page.
- Select a channel if the device has multiple channels.
- Set the switch to ON to enable recording schedule.
-
Set a recording schedule for a day in the week.
-
Set other time periods in the day.
Note:
Up to 8 time periods can be configured for each day. And the time periods cannot be overlapped with each other.
Figure 1. Setting Multiple Time Periods in a Day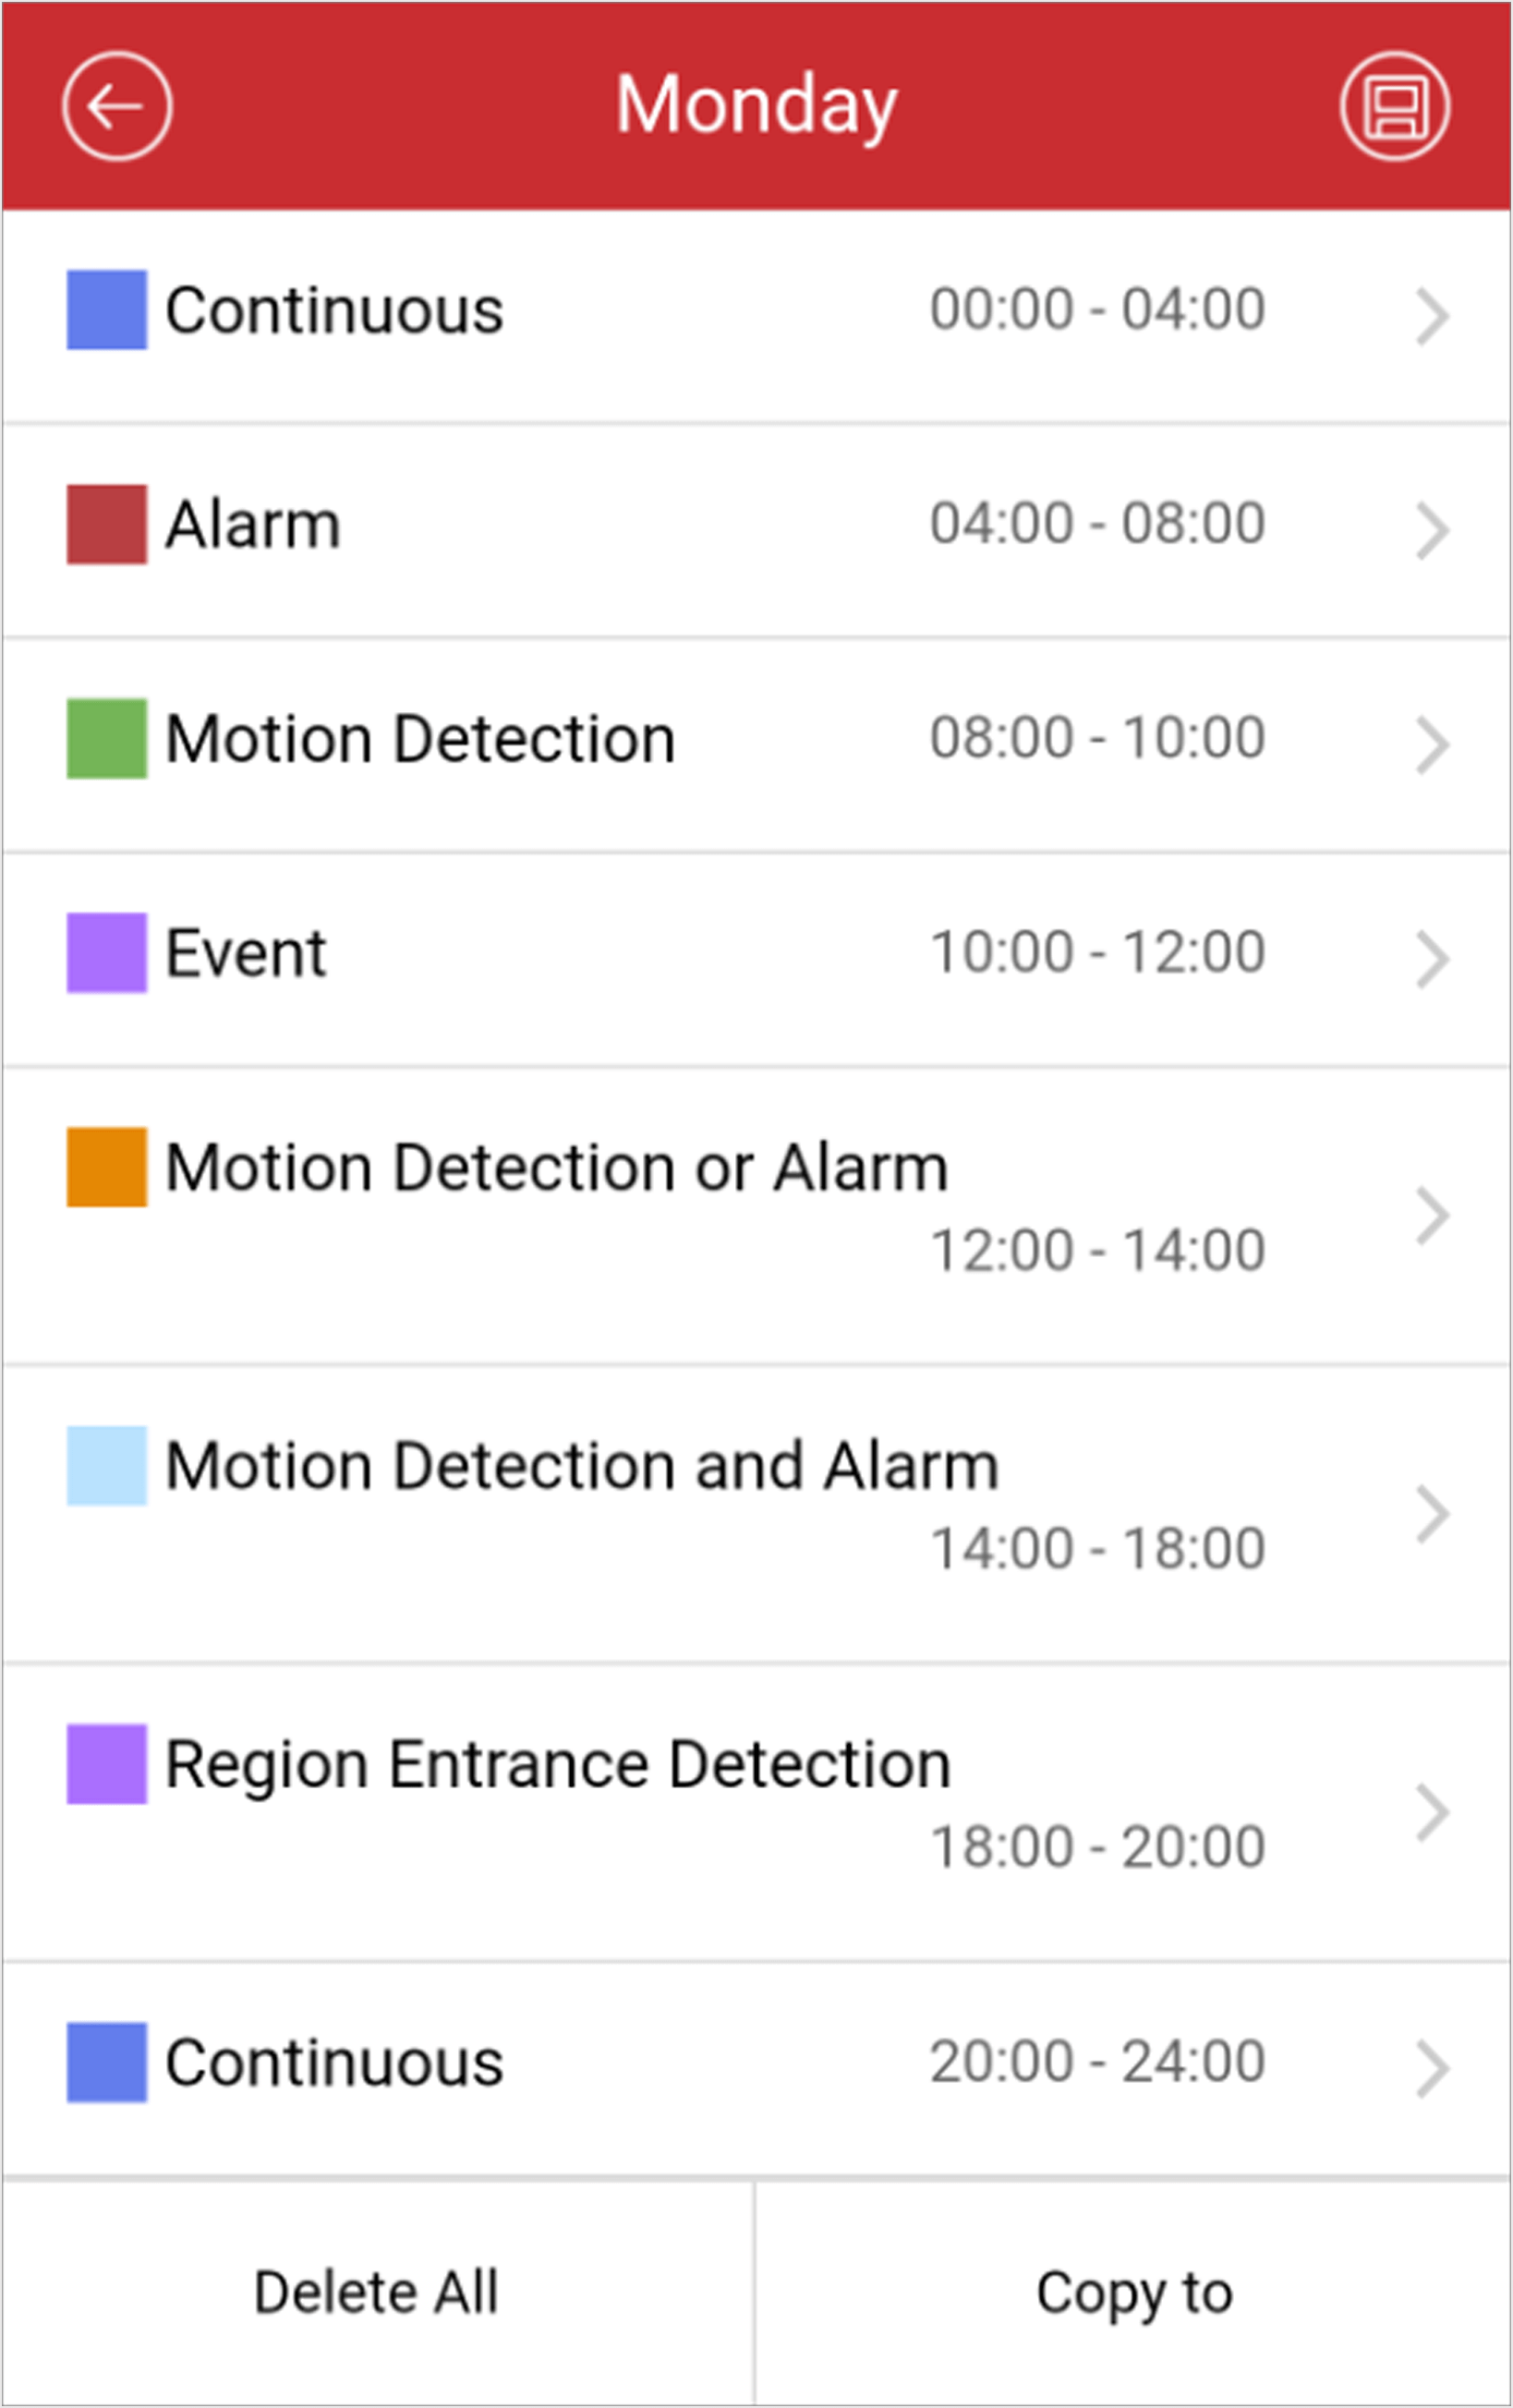
-
Set other time periods in the day.
- Optional:
Perform the following operations after saving the time
periods in one day.
Option Description Copy to Other Days
Tap Copy to to copy all the time periods settings to the other days in the week.
Delete All
Tap Delete All to clear all the configured time periods.
-
Tap
 to save the settings.