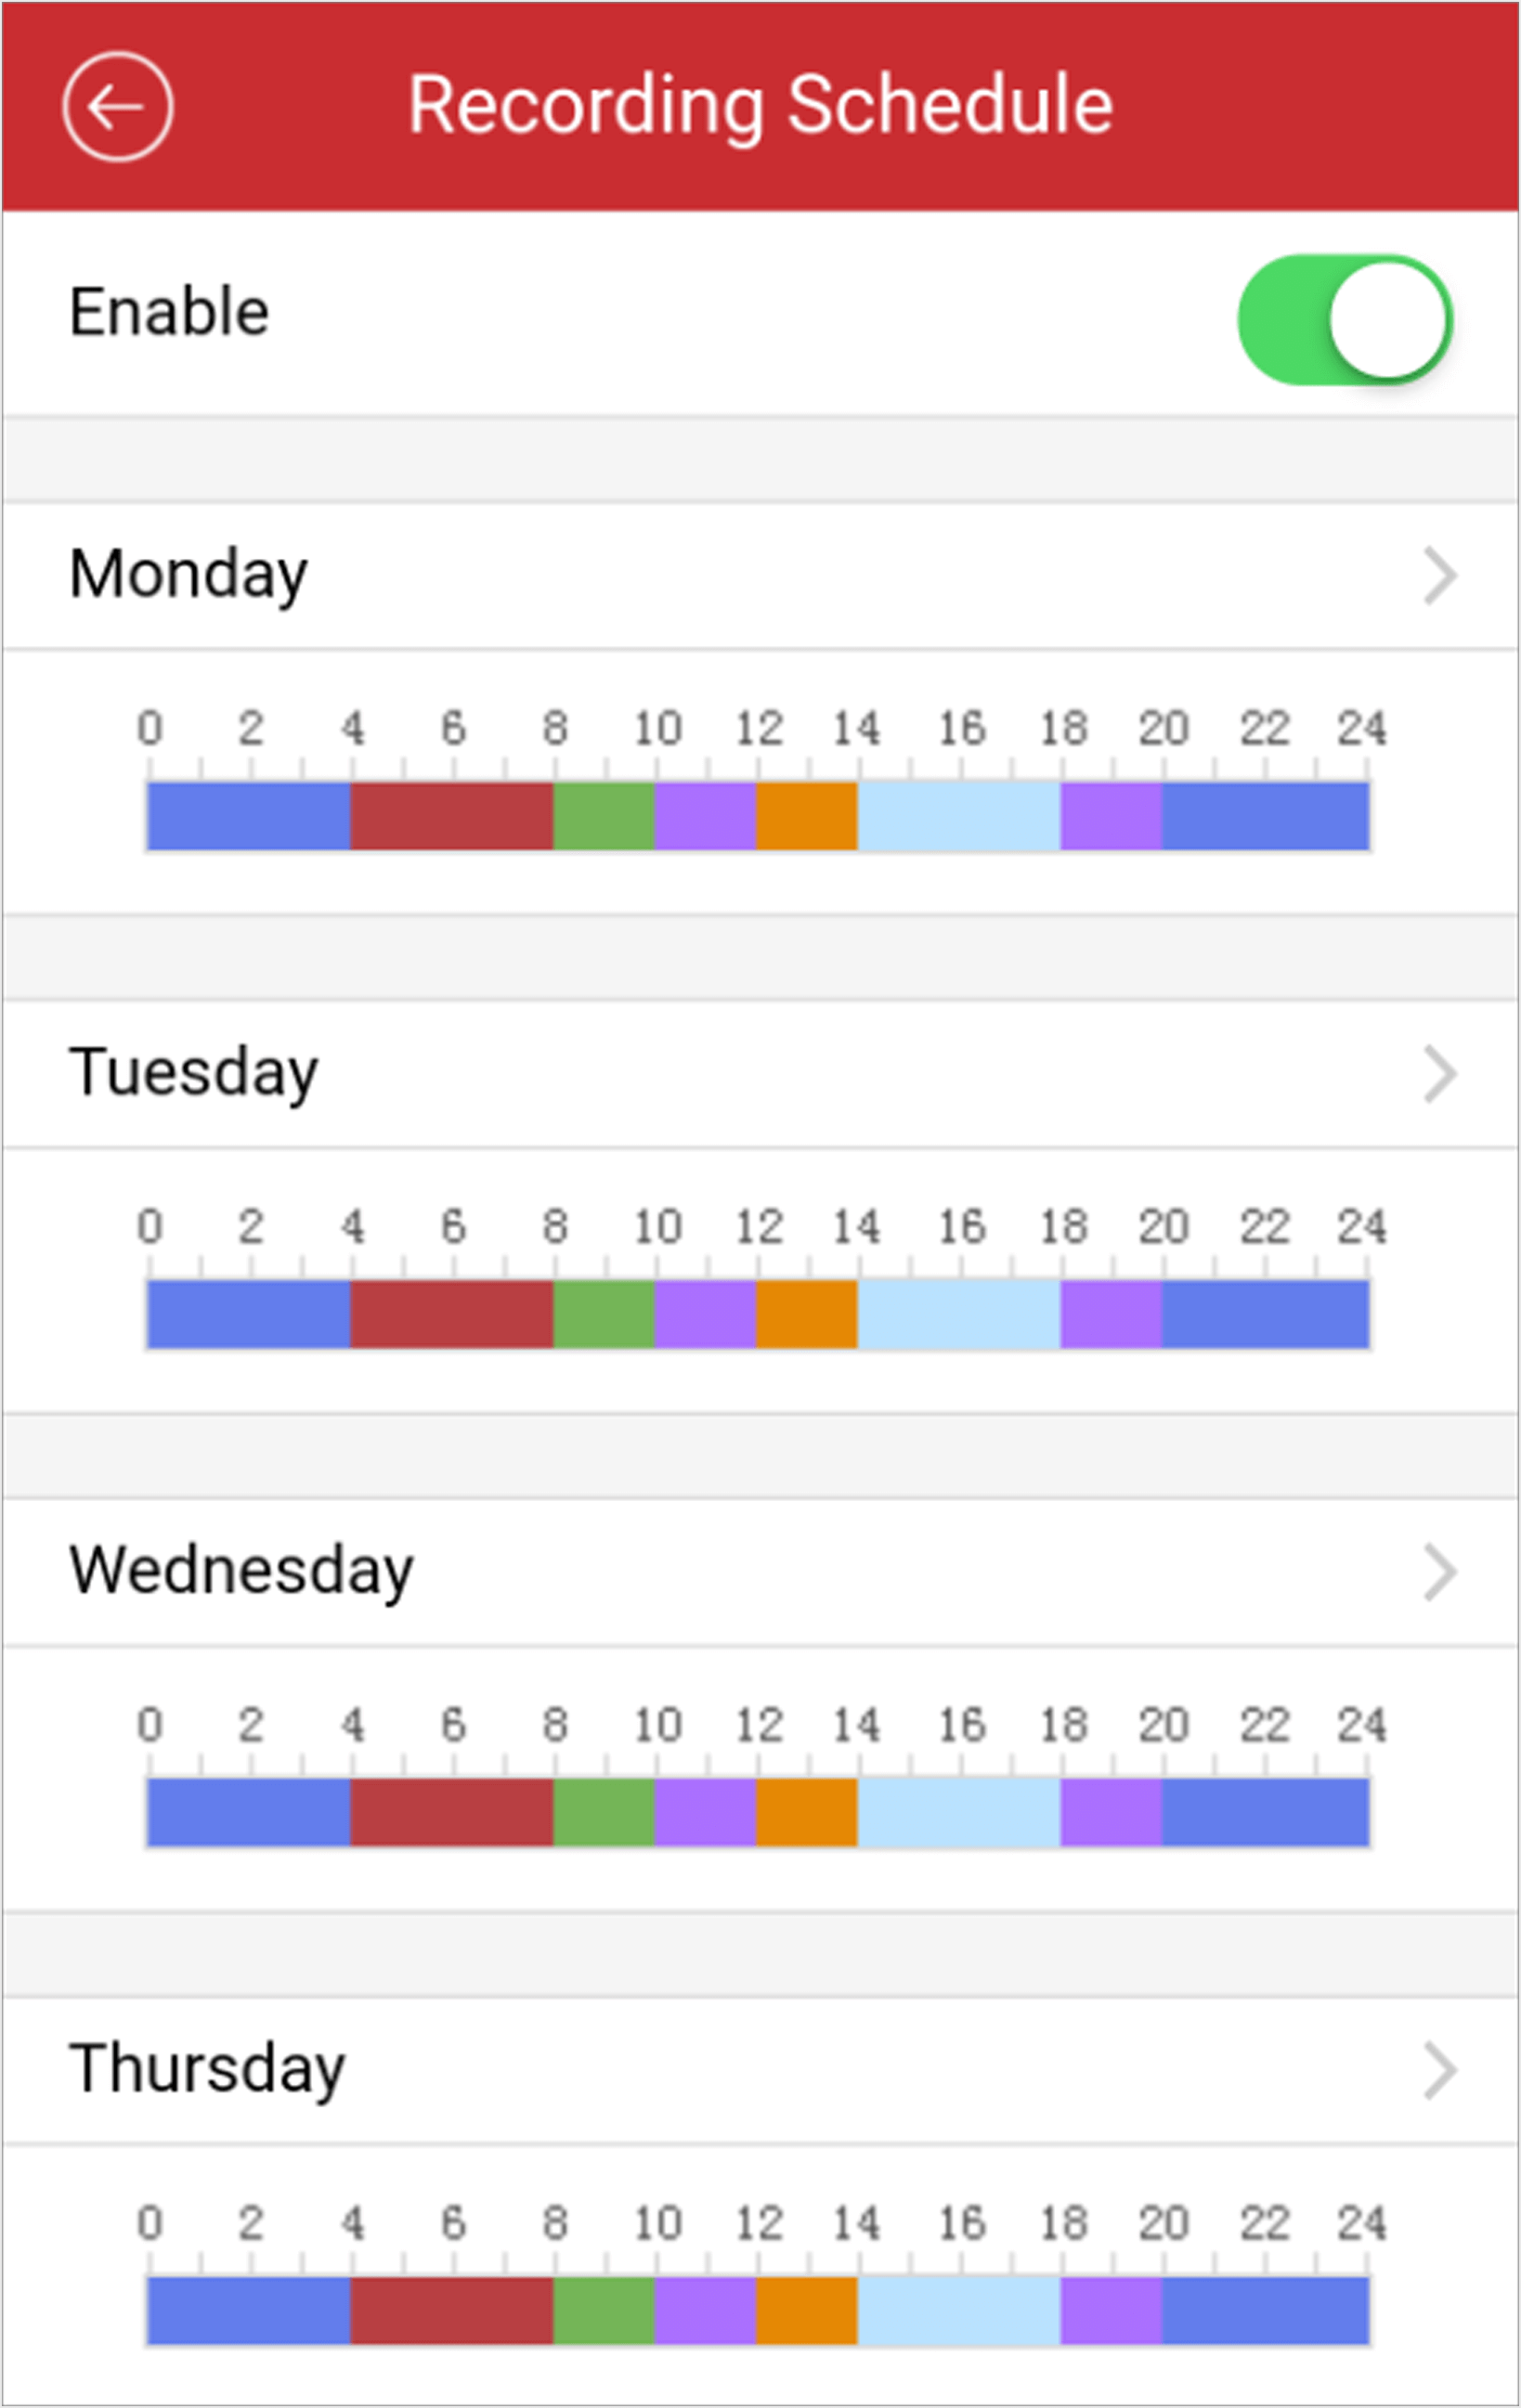
Set Recording Schedule
You can set a recording schedule for a channel of a specific device.
Add a device to the software. See #GUID-EBF11B68-48C6-467E-851F-F36D565BF0CC for details.
Perform this task if you need to set recording schedule for a channel of an added device.
-
Tap
 and tap
Devices to enter the Device Management page.
and tap
Devices to enter the Device Management page.
-
Tap
 and tap Remote
Configuration to enter the Remote Configuration page.
and tap Remote
Configuration to enter the Remote Configuration page.
-
Set
 to
to  to enable recording schedule.
-
Set a recording schedule for a day in the week.
-
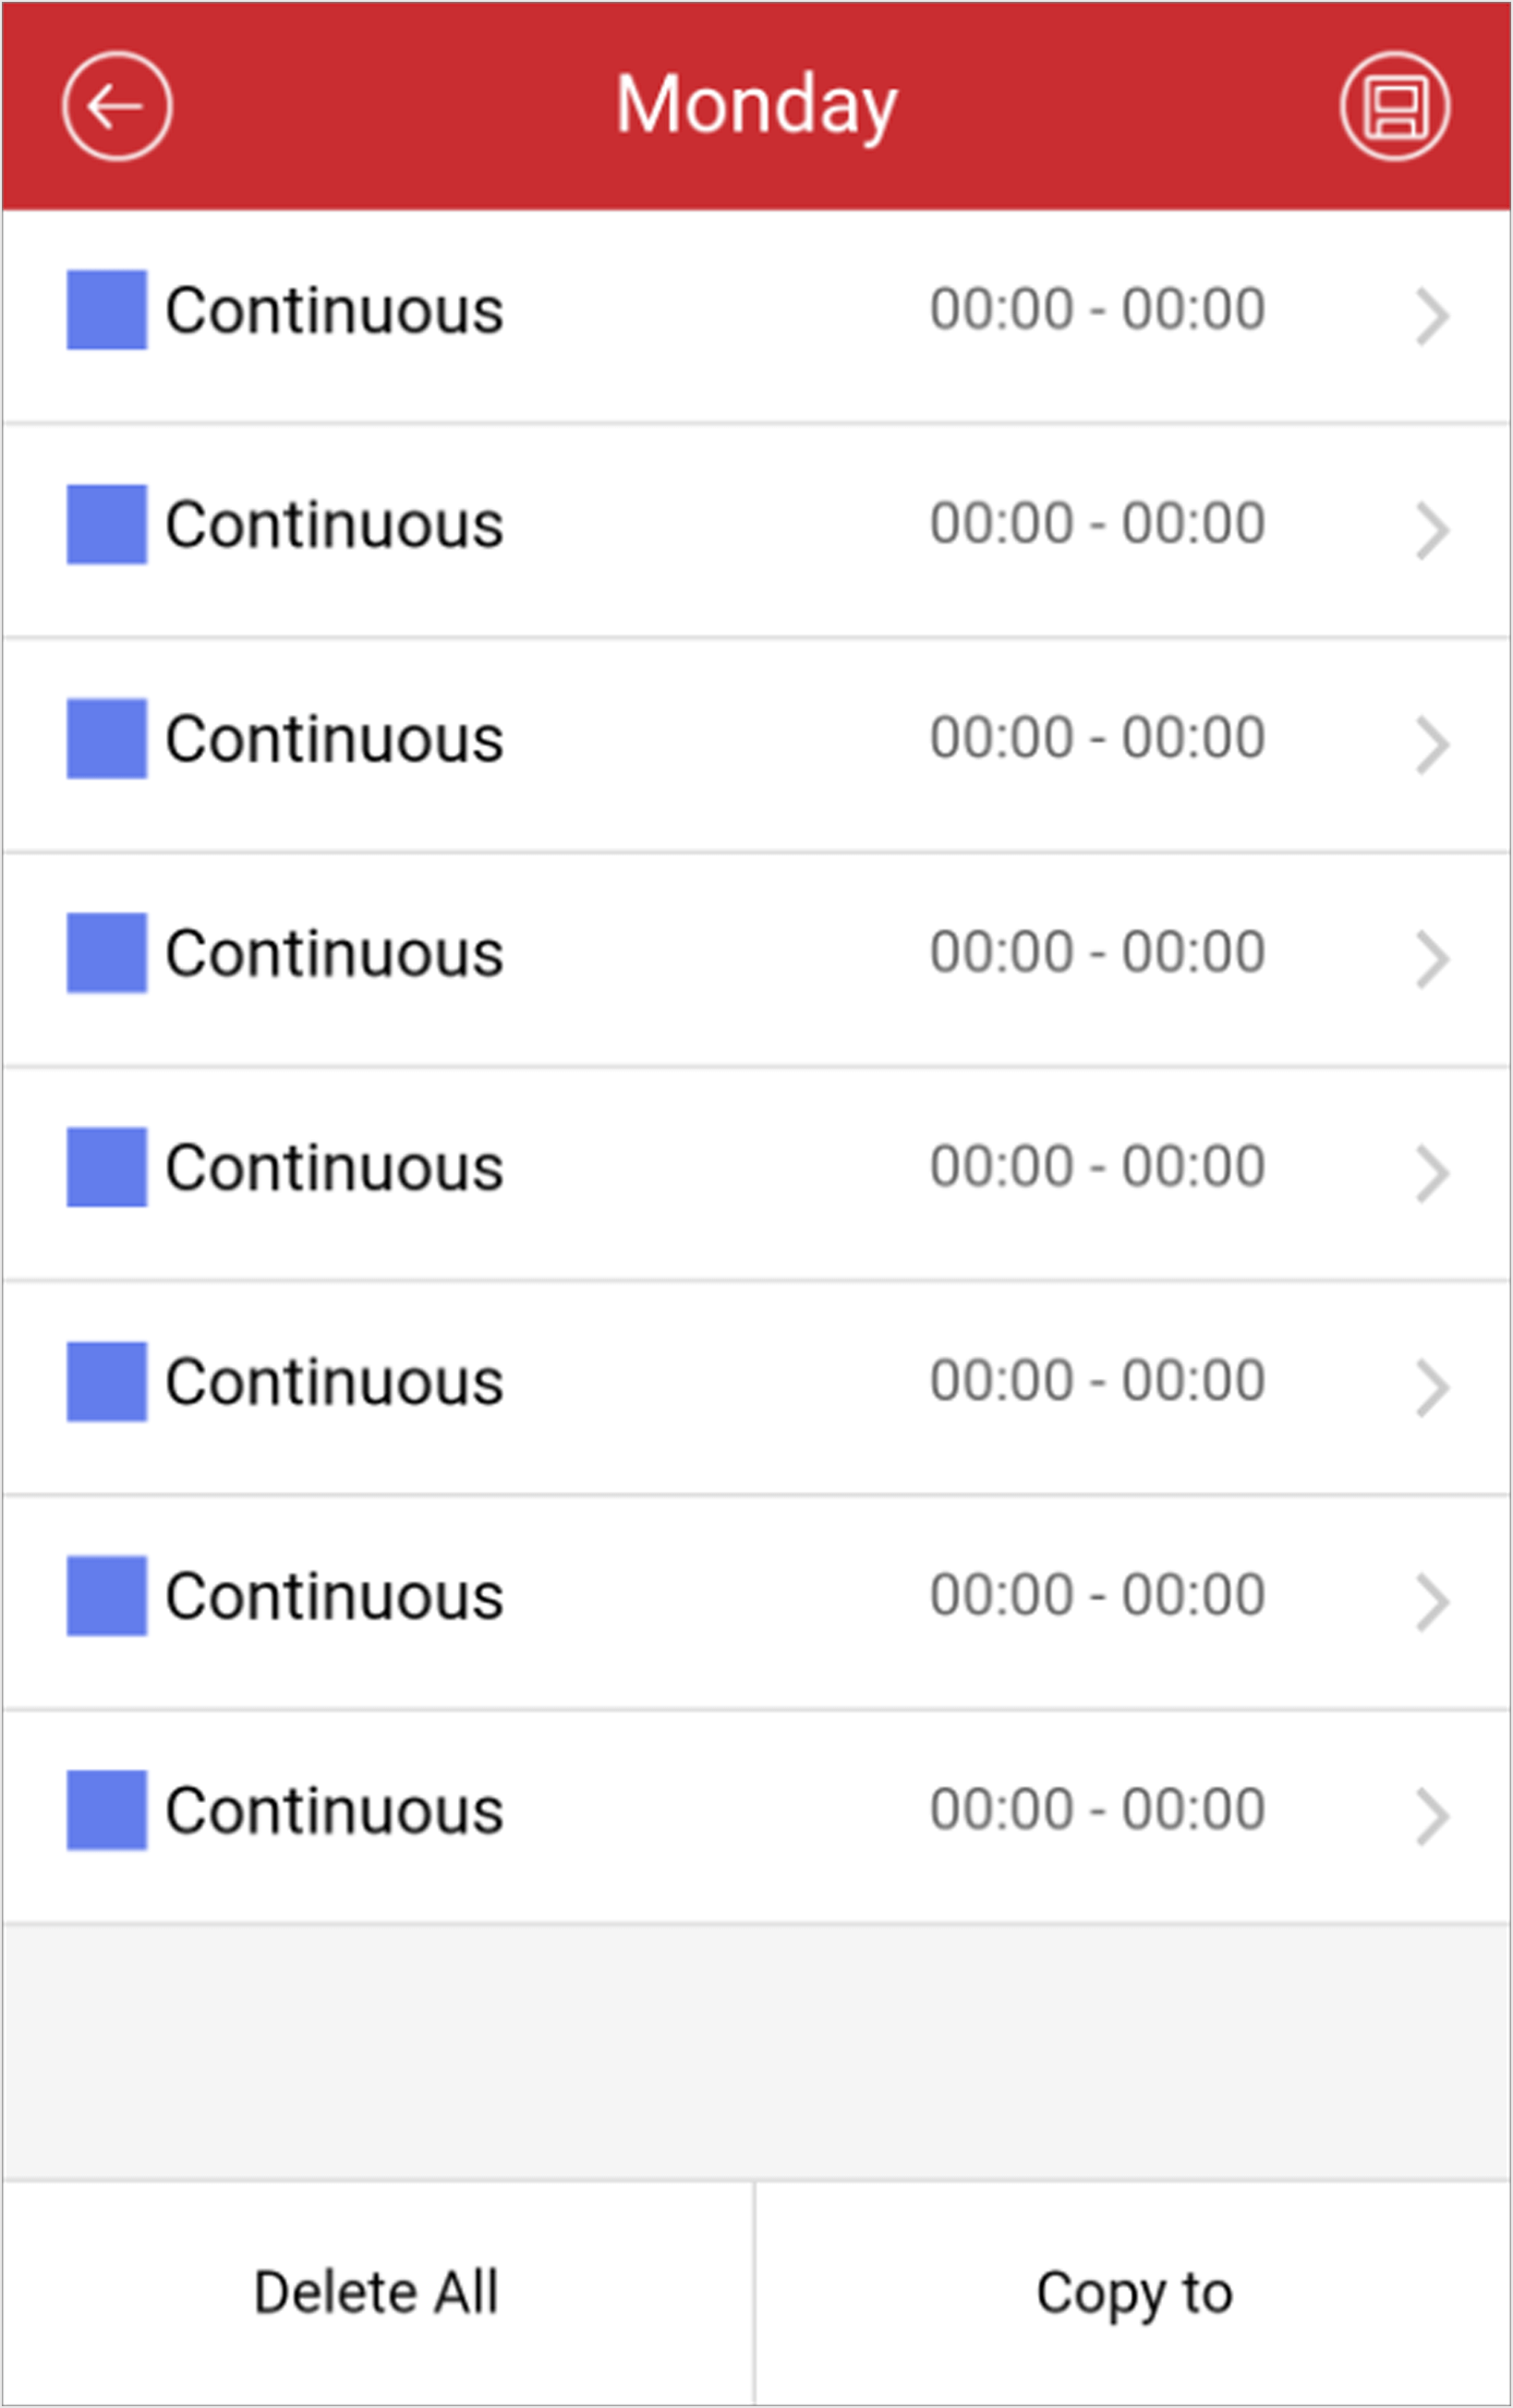
Tap a day in the week to open the following page.
Figure 1. Setting Recording Schedule
-
Tap the time period to set the recording type, start time, and end
time.
Figure 2. Time Period Settings
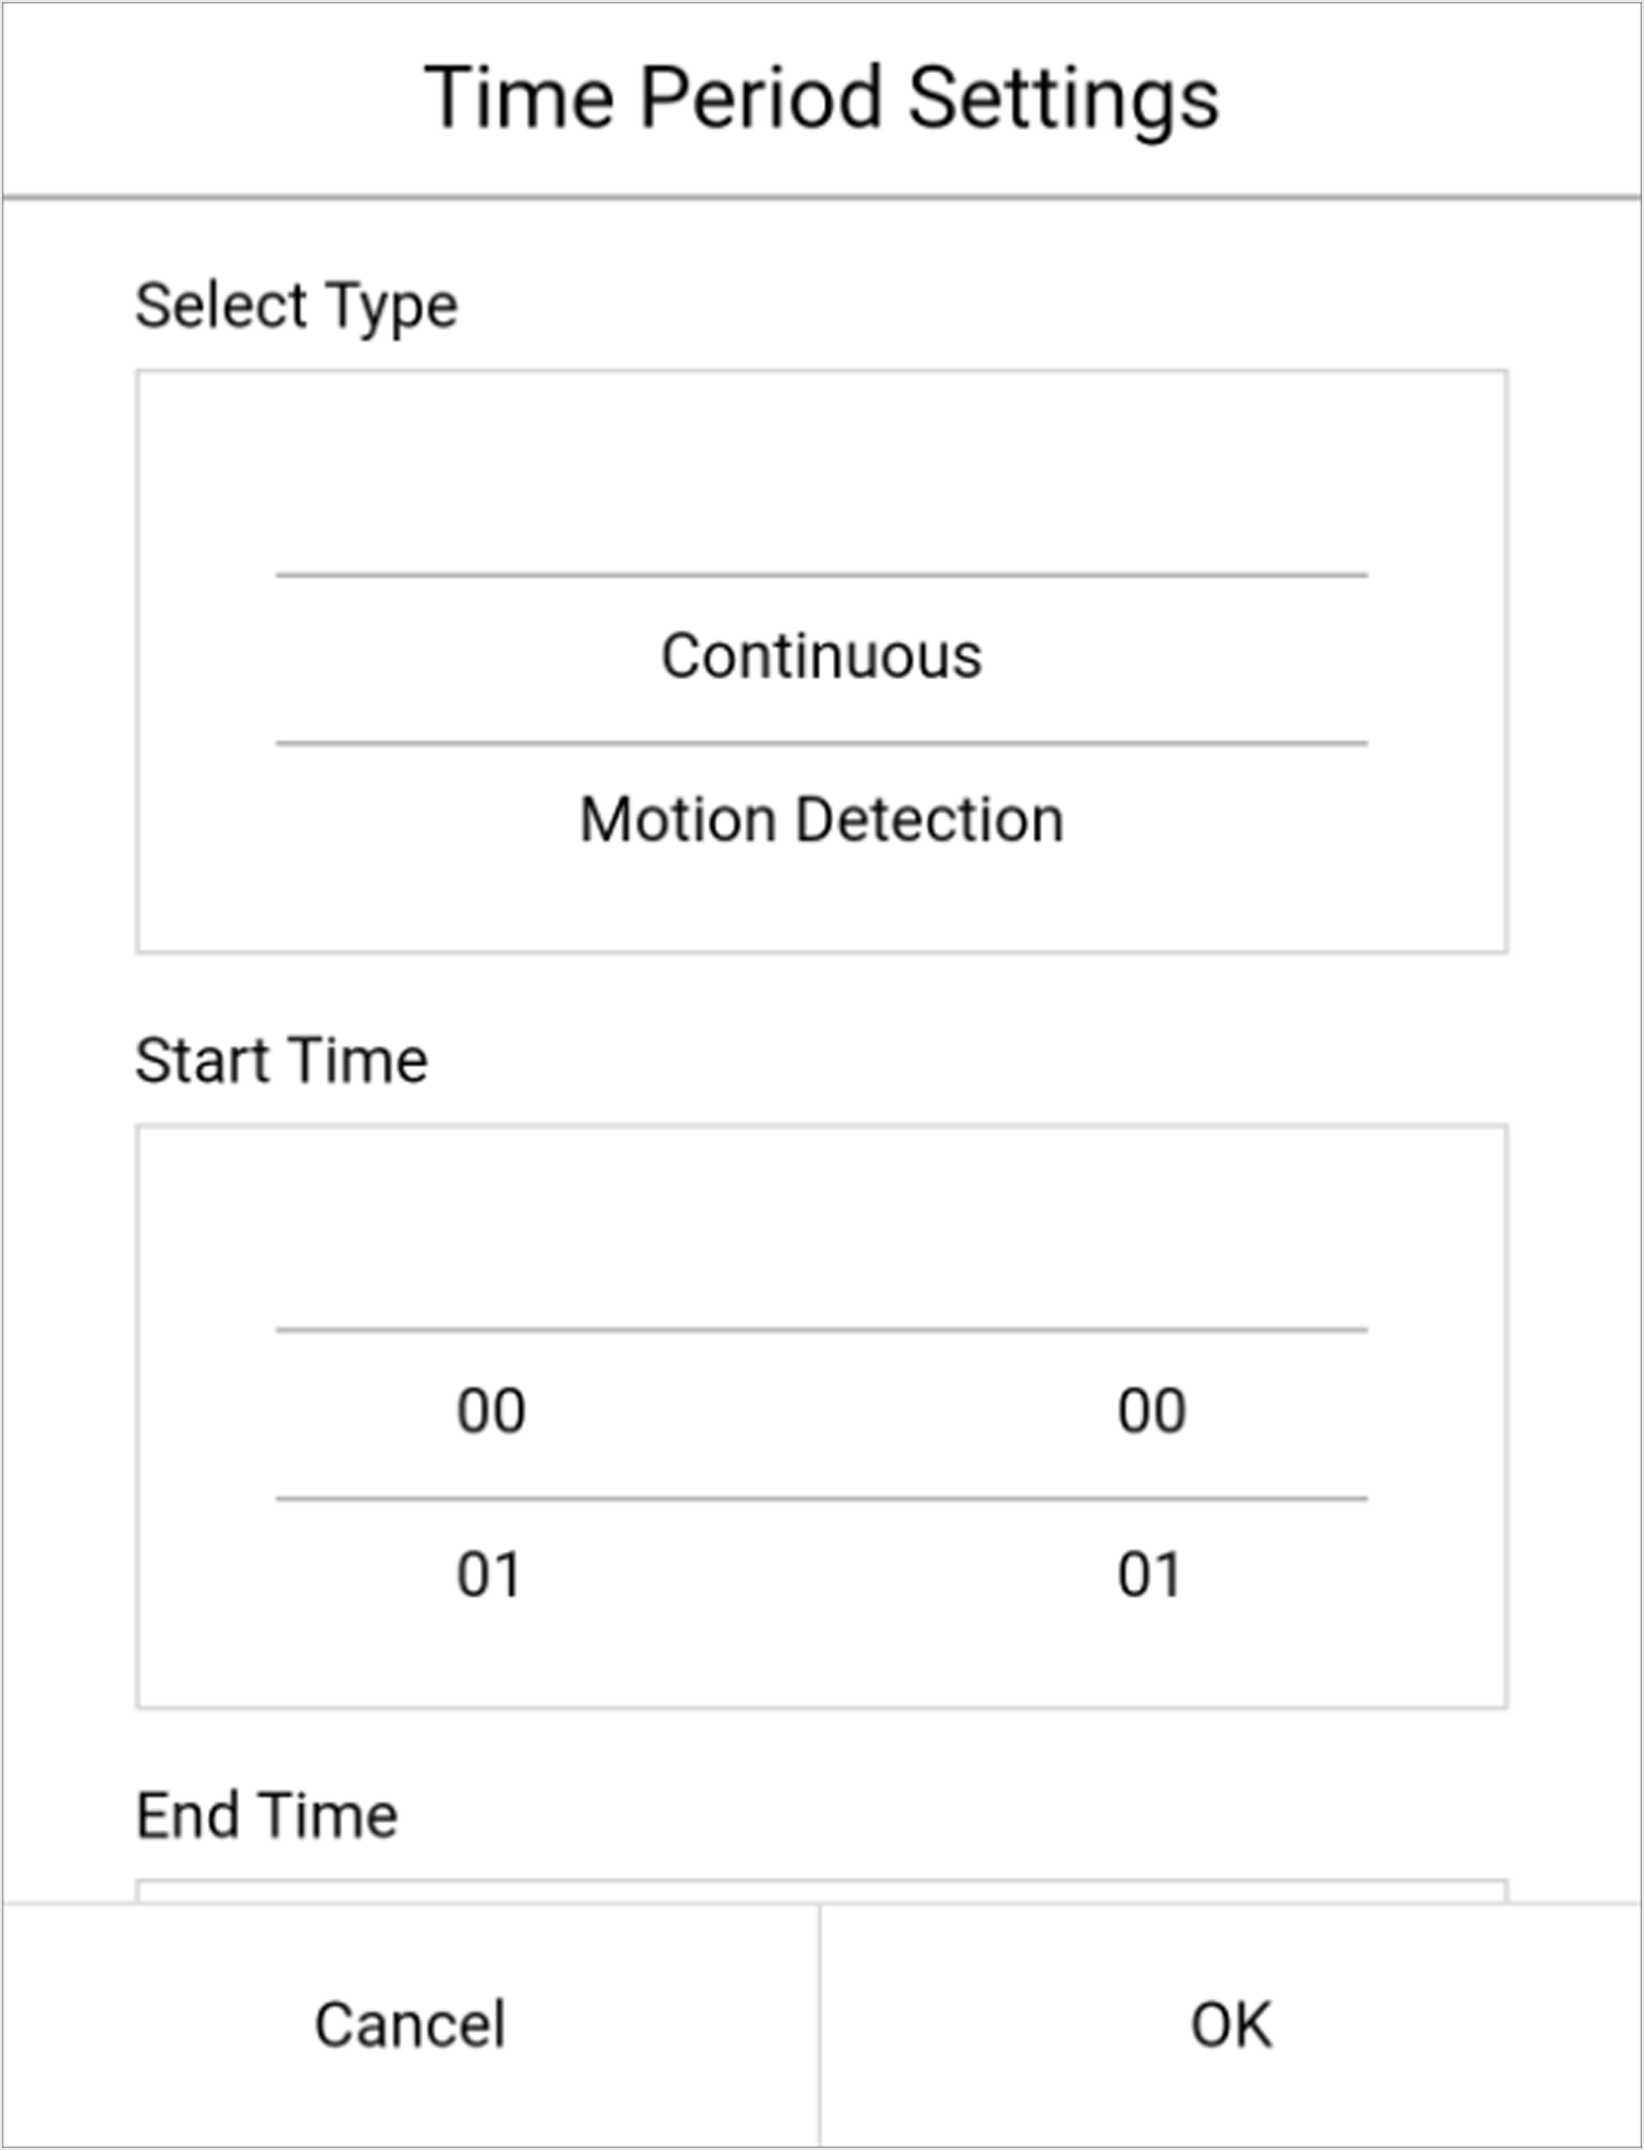
- Continuous
-
The video will be recorded automatically according to the time of the schedule.
- Motion Detection
-
The video will be recorded when the motion is detected.
- Alarm
-
The video will be recorded when the alarm is triggered via the external alarm input channels.
- Motion Detection or Alarm
-
The video will be recorded when the external alarm is triggered or the motion is detected.
- Motion Detection and Alarm
-
The video will be recorded when the motion and alarm are triggered at the same time.
- Event
-
The video will be recorded when any event is detected.
Note:You can also set the recording type as detailed event type, which should be supported by the device. For details, refer to the user manual of the device.
-
Set other time periods in the day.
Note:
Up to 8 time periods can be configured for each day. And the time periods cannot be overlapped with each other.
Figure 3. Setting Multiple Time Periods in a Day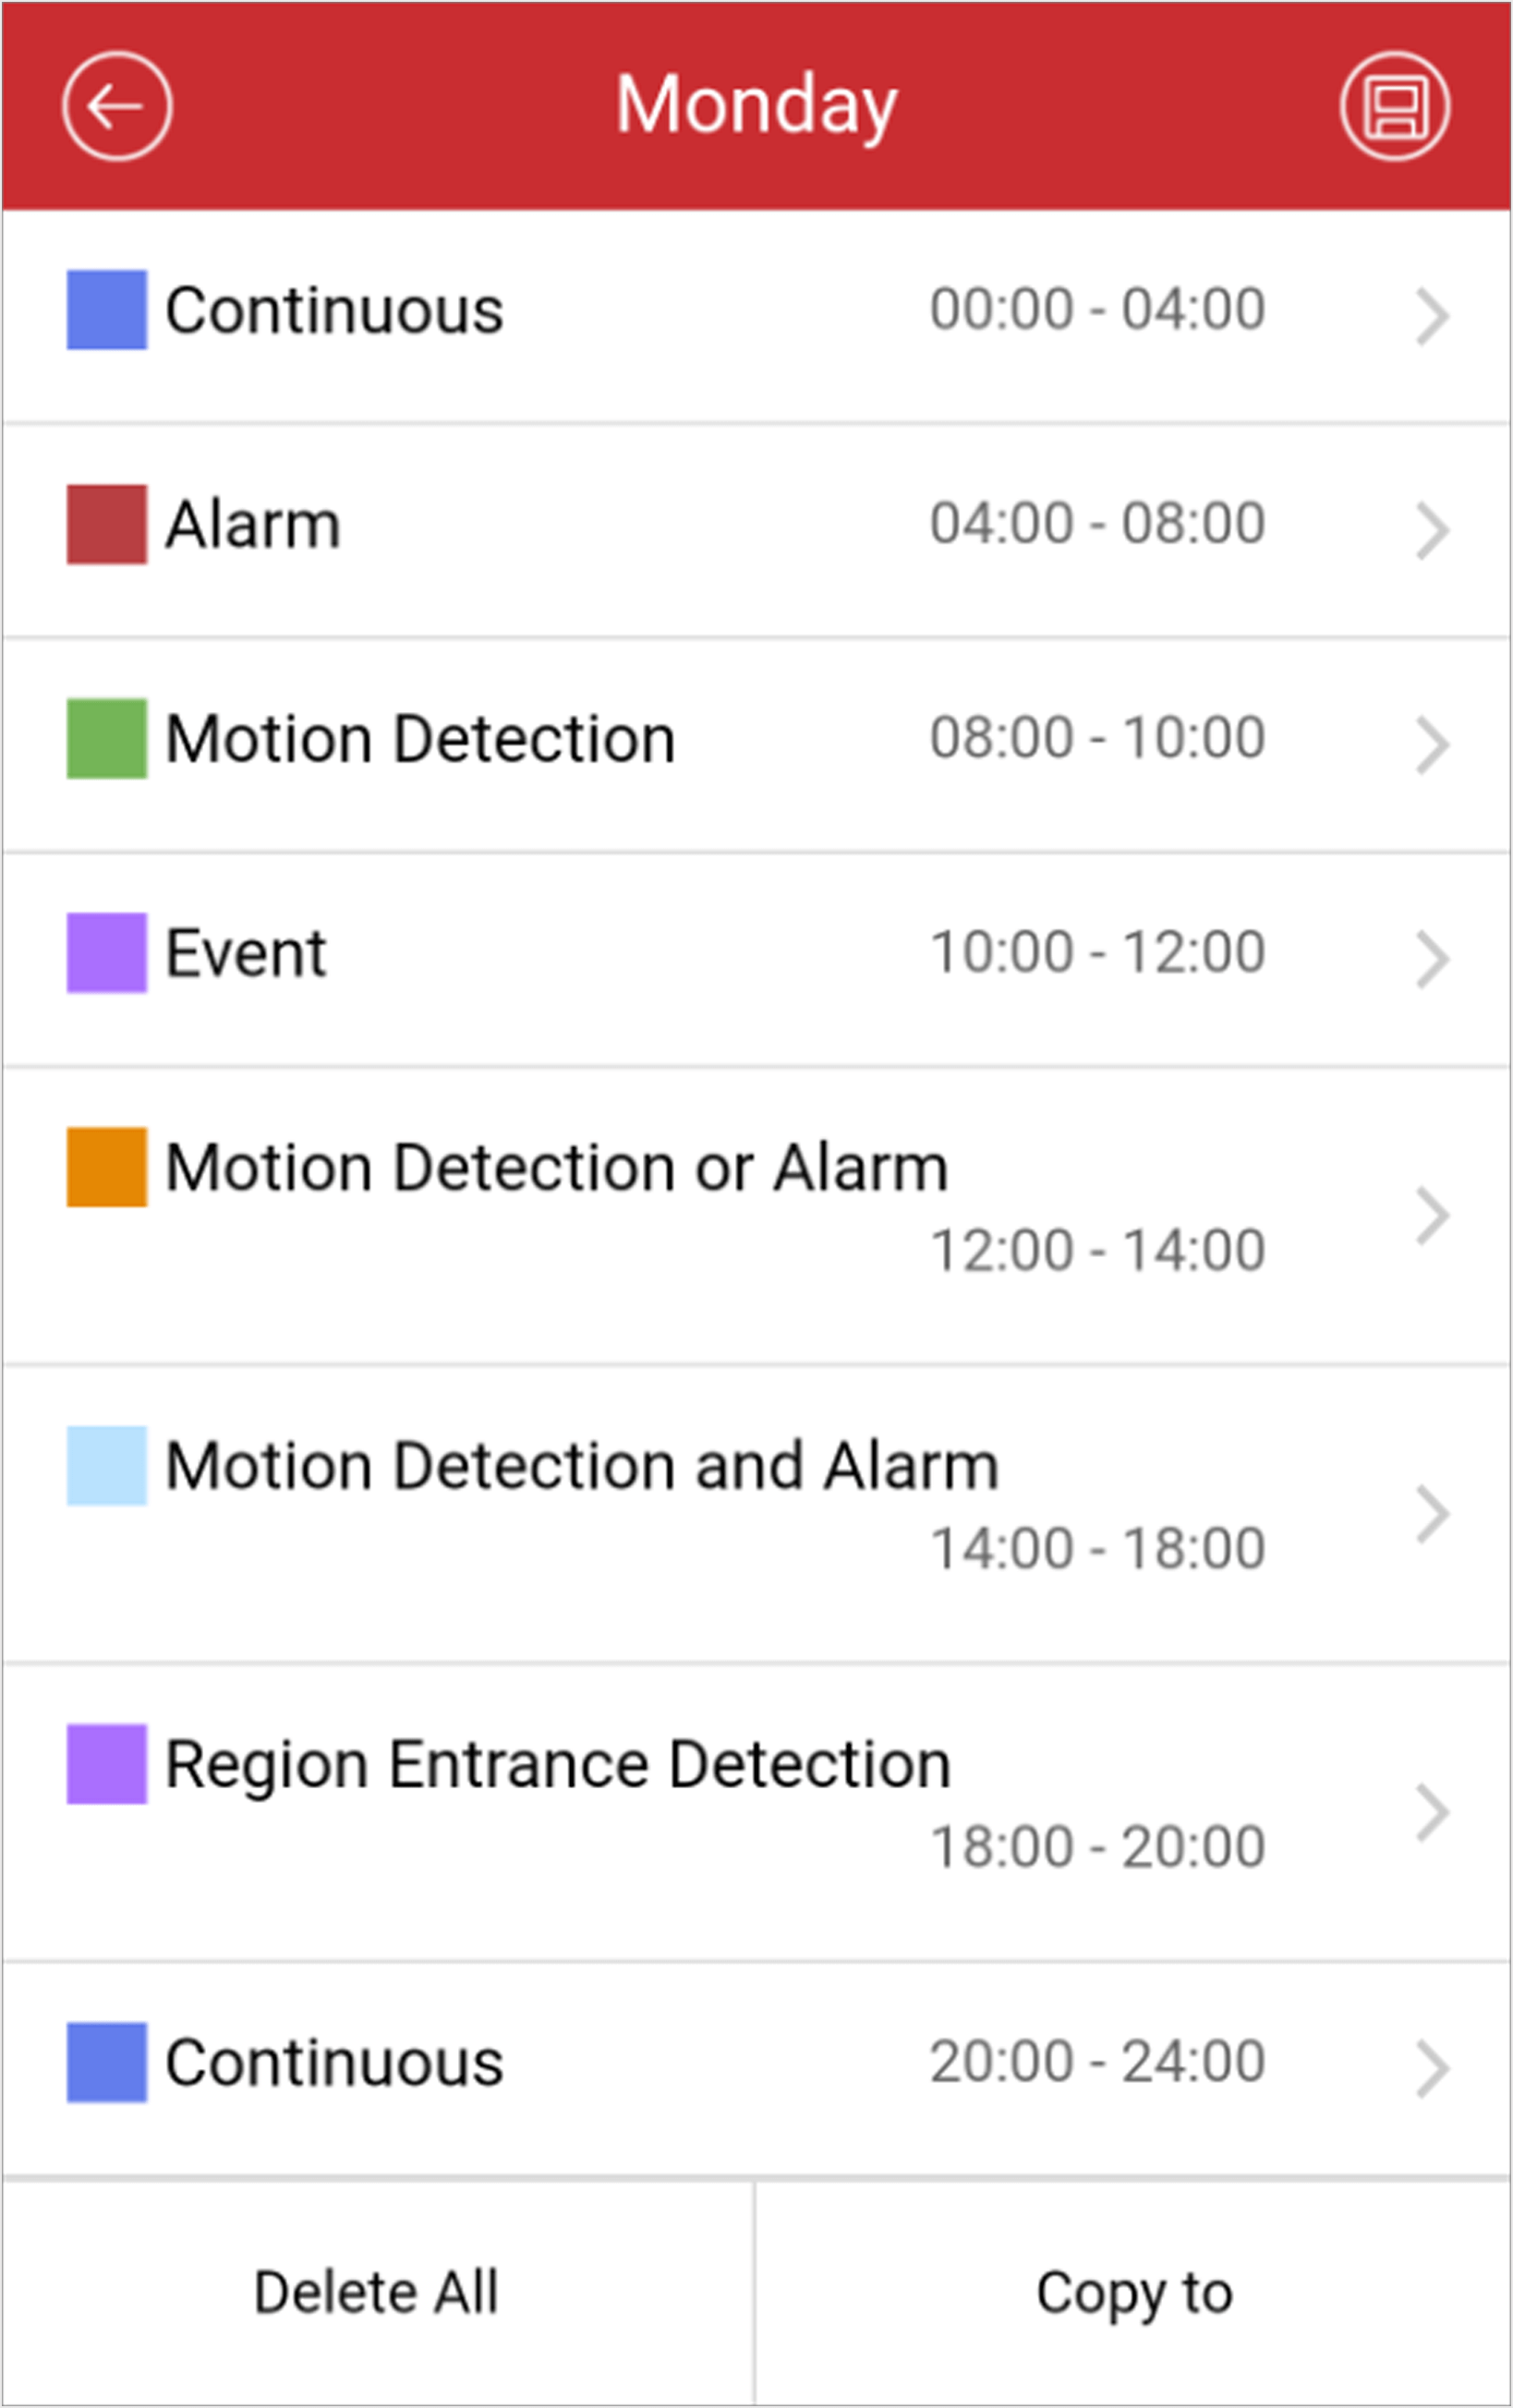
-
Tap a day in the week to open the following page.
-
Tap
 to save the settings.
Figure 4. Recording Schedule
to save the settings.
Figure 4. Recording Schedule