Purpose:
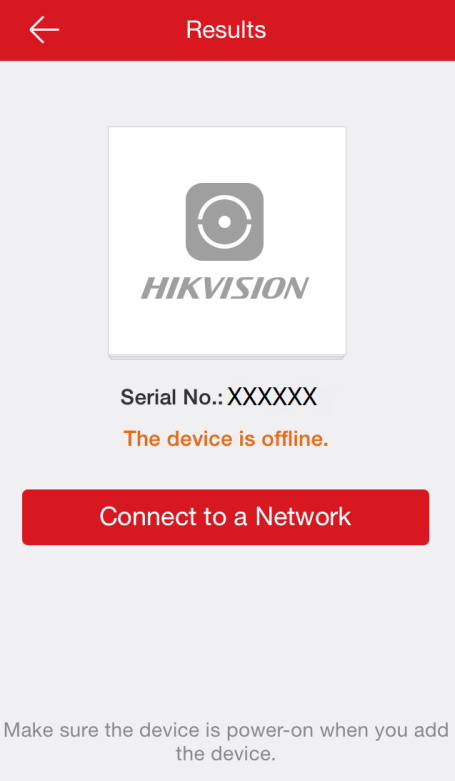
When adding a device to the client and the device is offline, you should connect the device to a network via the client.
Notes:
- You should connect the access control device to a network via other clients (e.g., iVMS-4200 client software).
- For details about connecting Mini Trooper to the network, refer to the user manual of Mini Trooper.
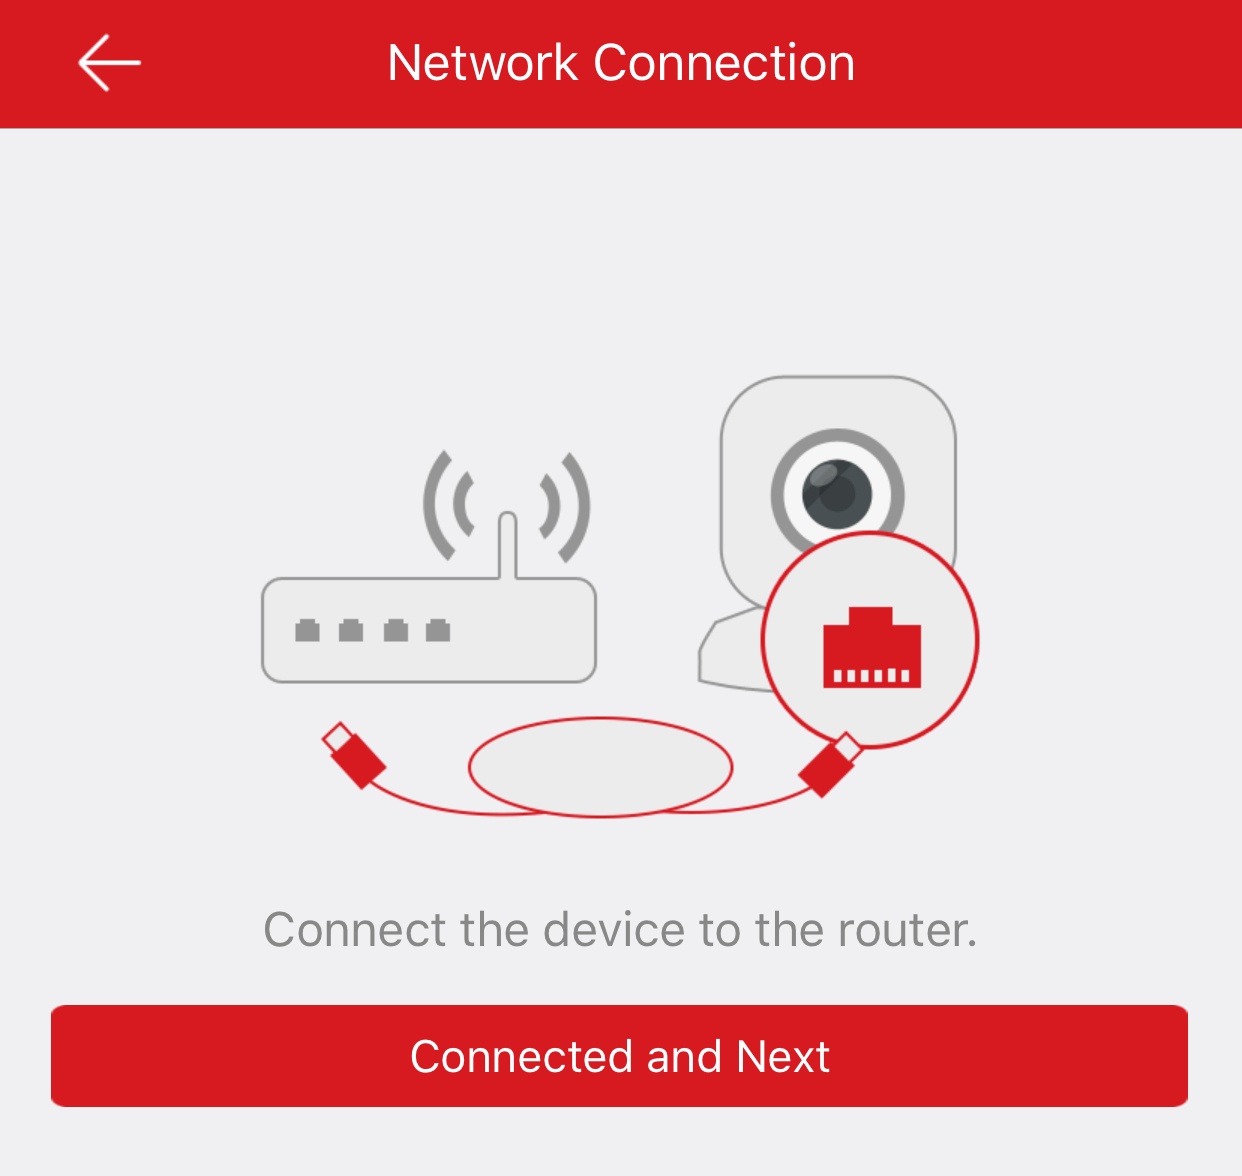
Connecting Device to Wired Network
Purpose:
If your device can connect to a wired network, follow the steps below to connect the device to the network.
Steps:
- On the Results page, tap Connect to a Network.
- Select a device type.
Note: If the client automatically recognizes the device type, skip this step.
- Connect the device to a router and then tap Connected and Next to complete network connection settings.
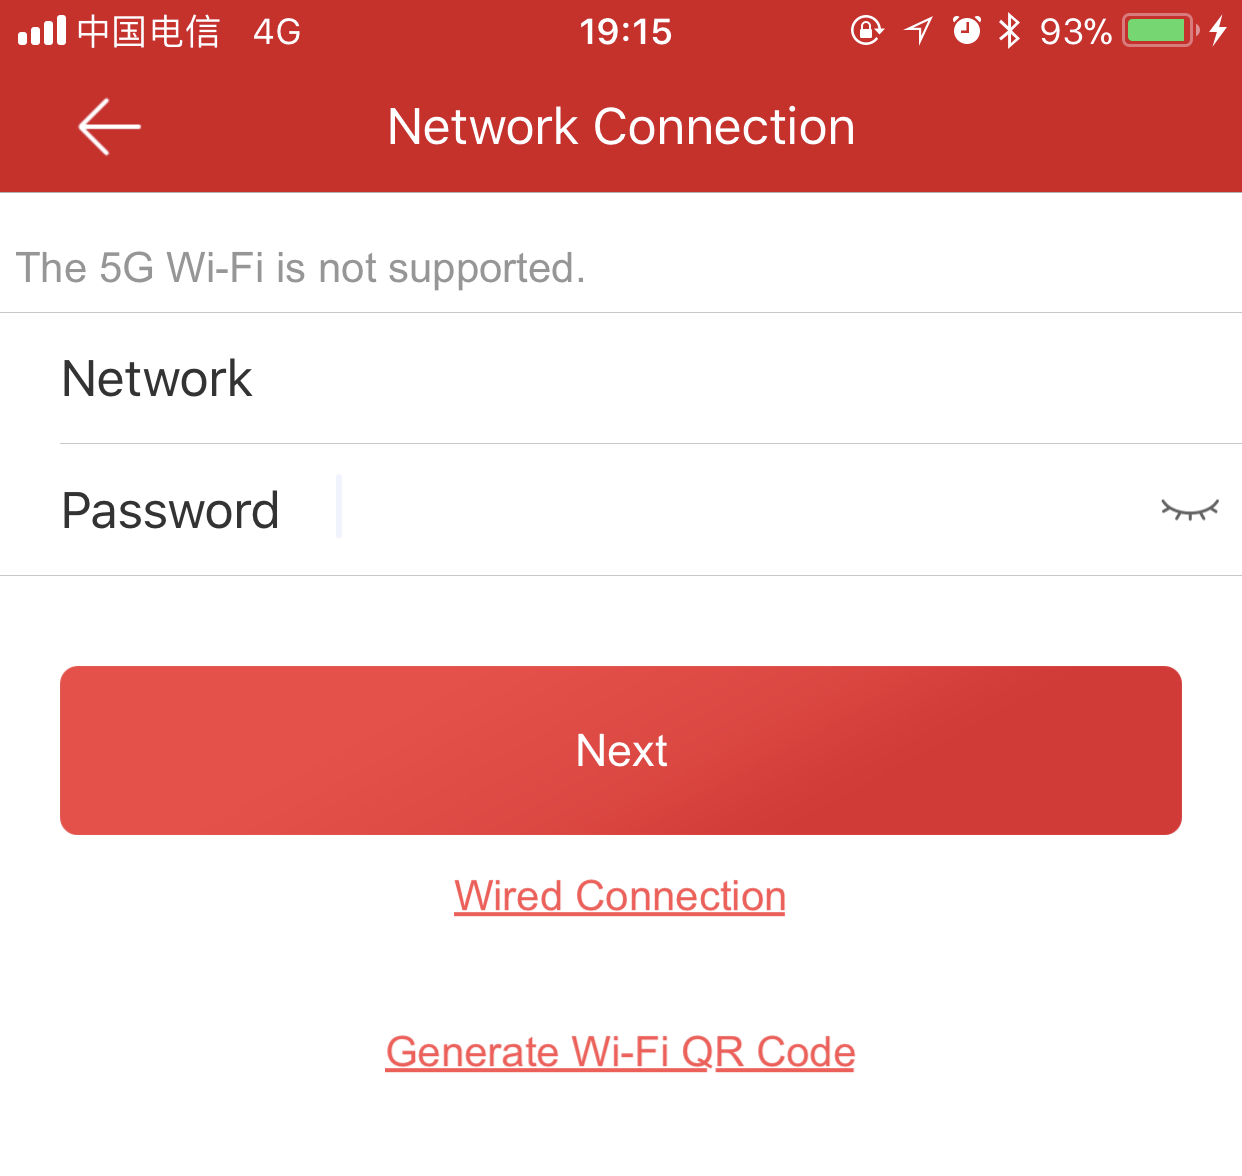
Connecting Device to Wireless Network
Purpose:
If your device can connect to a wireless network, follow the steps below to connect the device to the network.
Note: The "device" here excludes wireless doorbell, wireless security control panel, and Mini Trooper.
Before you start:
Make sure your phone has connected to a Wi-Fi network.
Steps:
- On the Results page, tap Connect to a Network.
- Select a device type.
Note: If the client automatically recognizes the device type, skip this step.
- Make sure the device is powered on and then tap OK on the Initialize Device page to enter the Network Connection page.
- Follow the information on the page to connect the device to the network.
Note: If you have set the device before, you should reset the device. Tap How to Reset and follow the instructions to reset your device.
Note: If the device also supports connecting a wired network, you can tap Wired Connection. For details about wired connection, see Connecting Device to Wired Network.
Connecting to Network by Wi-Fi Configuration
Purpose:
You can add a wireless doorbell to the network by using the doorbell to scan the QR code generated by the client.
Before you start:
Make sure your phone has connected to a Wi-Fi network.
Steps:
- On the Results page, tap Connect to a Network.
- Select a device type.
- Tap Wireless Connection
- Follow the instructions on the Initialize Device page and tap OK to enter the Wi-Fi Settings page.
- Generate the Wi-Fi QR code.
- Set the Wi-Fi name, the password, and the encryption type.
- Tap Generate.
- Follow the instructions on the pop-up window and tap OK.
- Follow the instructions on the page and tap I Have Scanned.
Note: If the client automatically recognizes the device type, skip this step.
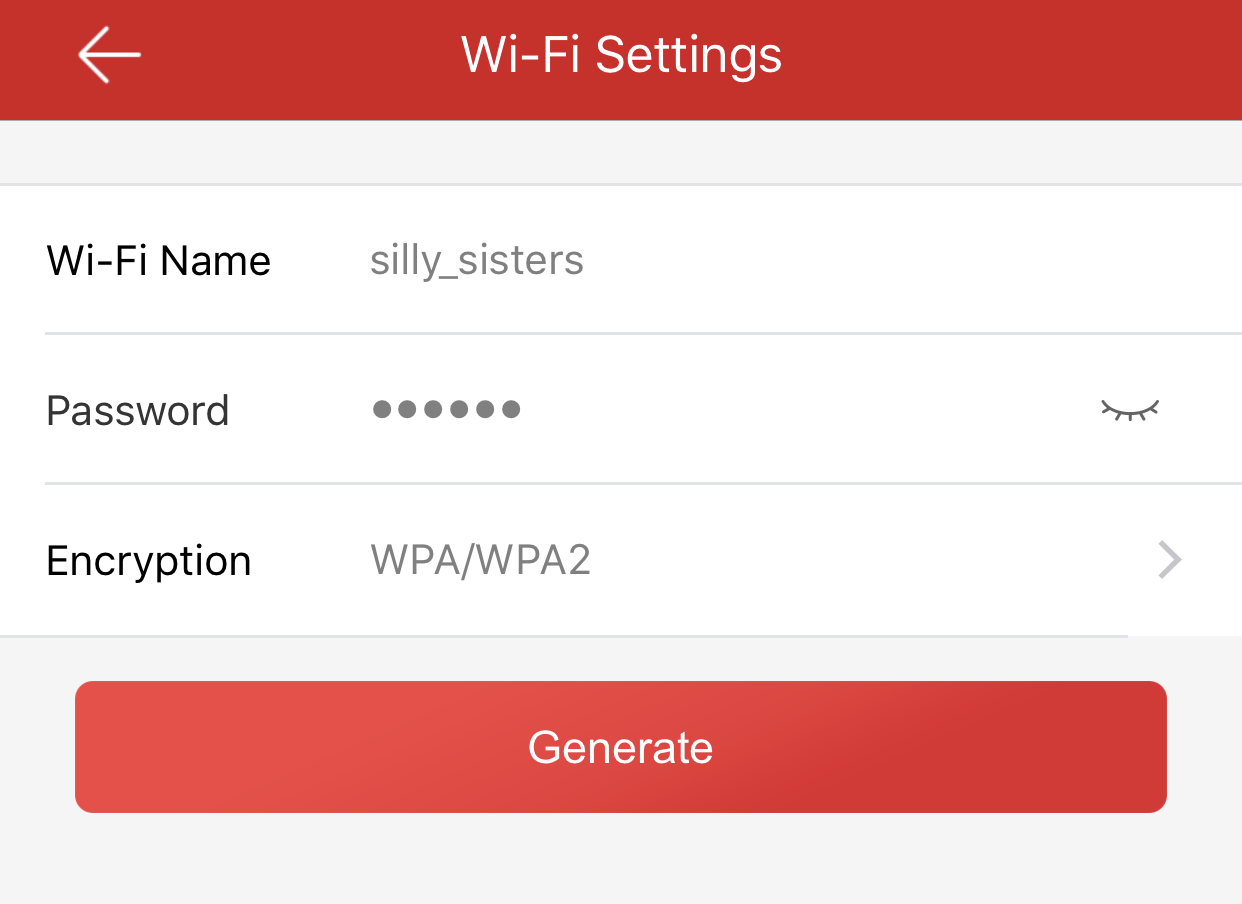
Note: If you have set the device before, you should reset the device. Tap How to Reset and follow the instructions to reset your device.
Connecting to Network via Access Point
Purpose:
In the client, Access Point (AP) refers to a networking hardware device, such as a wireless doorbell or a wireless security control panel, which can provide a Wi-Fi network for the phone to connect to.
Before You Start:
Turn on WLAN in your phone system.
Steps:
- On the Results page, tap Connect to a Network.
- Select a device type.
- Select Wireless Connection as the connection type.
- Follow the instructions on the displayed page(s) to enable the device's AP mode (or hotspot).
- Follow the instructions on the displayed page(s) to configure Wi-Fi for the device.
- Follow the instructions on the displayed page(s) to connect the phone to the device's Wi-Fi.
Note: If the system recognizes the device type, skip this step.
Note: For example, you should turn the DIP switch on the back cover of the wireless security control panel to the AP end to enable the AP mode.